Achieving perfectly cooked, irresistibly juicy chicken breast in the oven is a culinary triumph that's surprisingly within reach for any home cook. No more dry, rubbery chicken! This comprehensive guide will demystify the process, revealing the optimal times, temperatures, and techniques to transform a simple chicken breast into a tender, flavorful star of your meal.
Oven-baked chicken breast is a true weeknight hero: it’s lean, high in protein, incredibly versatile, and requires minimal hands-on effort. Whether you’re meal prepping for the week ahead, whipping up a quick family dinner, or simply looking for a healthy and delicious protein option, mastering this technique is a game-changer. The key to success lies in understanding the interplay of time, temperature, and technique – all designed to prevent the dreaded overcooked, dry outcome while ensuring food safety. Let's dive in and unlock the secrets to truly succulent chicken!
Why Oven-Baked Chicken Breast is a Weeknight Winner
There’s a reason oven-baked chicken breast holds a coveted spot in countless kitchens around the world. Beyond its delicious potential, it offers a host of benefits that make it an ideal choice for busy lifestyles and health-conscious eaters:
- Health-Conscious Cooking: Baking requires minimal added fats, relying on the oven's consistent heat to cook the meat through. This makes it a lean and healthy option, preserving the chicken's natural flavors without excessive oils.
- Effortless & Hands-Off: Once seasoned and placed in the oven, your work is largely done! This frees you up to prepare side dishes, attend to other tasks, or simply relax while your dinner cooks to perfection. It's the ultimate set-it-and-forget-it protein.
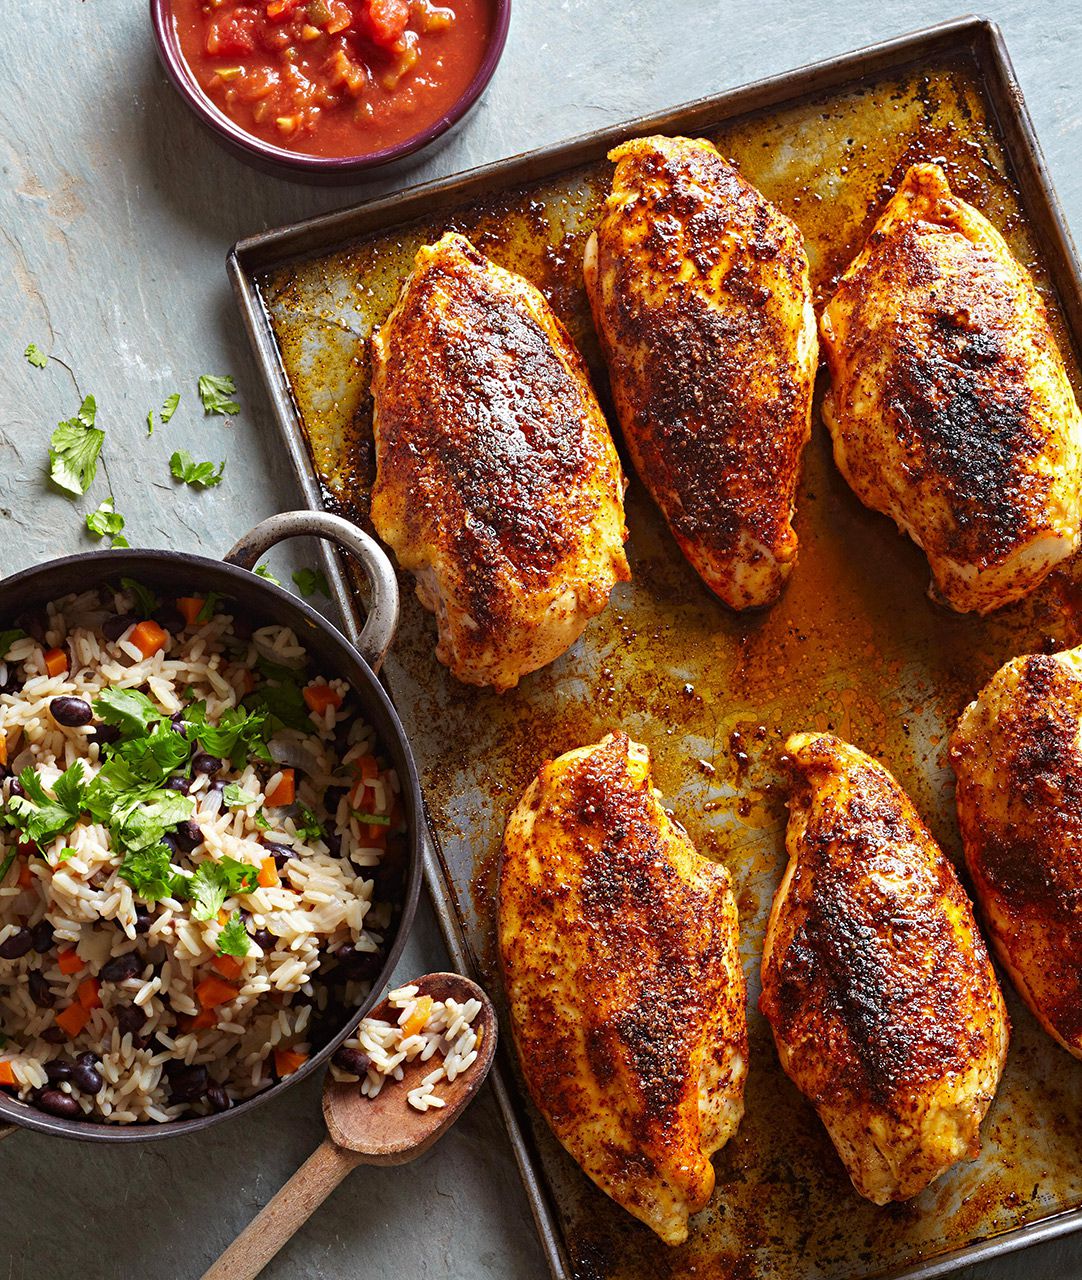
- Versatility Unleashed: Baked chicken breast is a blank canvas. It pairs beautifully with virtually any seasoning, marinade, or sauce you can imagine. From simple salt and pepper to bold herbs, spices, or zesty marinades, the possibilities are endless. It's fantastic for salads, sandwiches, pasta dishes, wraps, or as a main course with your favorite vegetables.
- Consistent Results: The even heat distribution of an oven ensures that multiple chicken breasts cook uniformly, making it perfect for batch cooking and meal prepping. You can bake several at once, ensuring consistent tenderness and flavor every time.
- Affordable & Accessible: Chicken breast is widely available and typically budget-friendly, making it a staple protein that's easy to incorporate into your regular meal rotation.
Understanding Chicken Breast Types: Boneless, Skinless vs. Bone-in, Skin-on
Not all chicken breasts are created equal, and understanding the differences between boneless, skinless and bone-in, skin-on varieties is crucial for determining how long to bake chicken breast for optimal results. These distinctions significantly impact cooking time, flavor, and texture.
Boneless, Skinless Chicken Breasts
These are the most popular and convenient choice for many home cooks. They cook relatively quickly and are easy to portion and prepare. However, their leanness means they are more susceptible to drying out if overcooked. They are excellent for recipes where you want the chicken to absorb flavors from marinades or sauces, and they slice beautifully for salads or stir-fries.
Bone-in, Skin-on Chicken Breasts
While they might seem a bit more intimidating, bone-in, skin-on chicken breasts often yield superior flavor and juiciness. The bone acts as an insulator, helping the meat cook more evenly and retain moisture. The skin, when rendered crisp, adds incredible flavor and creates a protective layer that helps keep the breast moist. The fat under the skin melts and bastes the meat during cooking, leading to a richer, more succulent result. These require a longer cooking time due to the presence of the bone and skin.
The Sweet Spot: Optimal Oven Temperature for Juicy Chicken
When it comes to achieving that elusive juicy chicken breast, oven temperature plays a pivotal role. Many expert chefs and test kitchens, including the likes of Food Network, consistently recommend baking chicken breasts at 375°F (190°C). Here’s why this temperature is your best bet:
- Even Cooking: 375°F strikes a perfect balance. It's hot enough to cook the chicken through relatively quickly, but not so aggressive that it dries out the exterior before the interior reaches the desired doneness. This allows for even heat penetration from edge to center.
- Tender & Juicy Results: At this moderate high heat, the chicken cooks gently yet efficiently, allowing the muscle fibers to relax rather than seize up. This helps the meat retain its natural moisture, resulting in a tender and juicy texture.
- Good Browning: This temperature is also conducive to achieving a nice golden-brown exterior, especially if the chicken has been patted dry and seasoned well, adding to both the visual appeal and flavor.
While some recipes might call for higher (e.g., 400°F) or lower (e.g., 350°F) temperatures, 375°F offers a reliable baseline for consistent success with chicken breasts.
How Long to Bake Chicken Breast for Perfect Doneness
This is the question that brings most home cooks here! The exact cooking time for master oven chicken depends primarily on the type of chicken breast, its size and thickness, and whether it’s fresh or frozen. Remember, these are guidelines; always use an instant-read thermometer for guaranteed safety and optimal results.
For Large, Boneless, Skinless Chicken Breasts (approx. 6-8 oz each):
- Bake in a 375°F (190°C) oven for approximately 20 to 30 minutes.
- Smaller breasts (around 4-5 oz) might be done in as little as 18-20 minutes, while very thick, larger breasts could take up to 35 minutes.
For Large, Bone-in, Skin-on Chicken Breasts (approx. 10-12 oz each):
- Bake in a 375°F (190°C) oven for approximately 35 to 40 minutes.
- The bone and skin add insulation, requiring a longer cooking time compared to their boneless counterparts.
Important Considerations:
- Thickness is Key: A thicker chicken breast will always take longer to cook than a thinner one, even if they have the same weight. If your chicken breasts vary greatly in thickness, consider pounding the thicker parts slightly to achieve a more uniform dimension.
- Starting Temperature: Chicken breasts taken directly from the refrigerator will take a few minutes longer to cook than those allowed to come closer to room temperature for 15-20 minutes before baking.
- Oven Calibration: Ovens can vary! If you suspect your oven runs hot or cold, an oven thermometer can help you verify its accuracy.
- Don't Overcrowd: Ensure your chicken breasts have space between them on the baking sheet. Overcrowding can steam the chicken instead of baking it, leading to less appealing texture and color.
Ensuring Food Safety: How to Tell When Your Chicken is Done
While timing guidelines are helpful, the most reliable way to ensure your chicken is perfectly cooked and safe to eat is by using an instant-read meat thermometer. There's no guesswork involved when you achieve perfect chicken breast: oven times, temp & 165°F doneness.
- The Golden Rule: Chicken is safely cooked when its internal temperature reaches 165°F (74°C).
- How to Use an Instant-Read Thermometer: Insert the thermometer into the thickest part of the chicken breast, avoiding any bones (if bone-in). Make sure the tip is fully embedded in the meat and not touching the baking sheet.
- Visual Check (Secondary): If you don't have a thermometer, you can make a small cut into the thickest part of the chicken. The juices should run clear, and there should be no pink meat visible. However, this method is less accurate and can result in some loss of juices, making it a less ideal option.
Pro Tip: Remove the chicken from the oven when it hits 160-162°F (71-72°C). The internal temperature will continue to rise a few degrees as it rests (this is called carryover cooking), reaching the safe 165°F target. This helps prevent overcooking.
The Crucial Resting Period: Don't Skip It!
You’ve done all the hard work, don't let it go to waste by slicing into your chicken immediately! Resting the chicken breast after it comes out of the oven is a non-negotiable step for truly juicy results.
- Why Rest? When chicken cooks, the muscle fibers contract, pushing the juices towards the center. If you cut into it right away, those juices will gush out onto your cutting board, leaving you with dry meat. Resting allows the muscle fibers to relax and reabsorb those precious juices, distributing them evenly throughout the breast.
- How Long to Rest? Cover the chicken loosely with foil and let it rest for at least 10 minutes before slicing, dicing, or serving. For very large breasts, 15 minutes is even better.
Pro Tips for Extra Juicy Results
Beyond the fundamental timings and temperatures, a few extra steps can elevate your baked chicken breast from good to truly exceptional:
- Pound for Evenness: If your boneless, skinless chicken breasts are unevenly thick, place them between two sheets of plastic wrap and gently pound the thicker parts with a meat mallet or rolling pin until they are uniform. This ensures even cooking and prevents the thinner parts from drying out.
- Brine or Marinate: For an extra boost of moisture and flavor, consider a quick brine (saltwater solution) or a flavorful marinade for at least 30 minutes, or even a few hours, before baking. Acids in marinades (like lemon juice or vinegar) also help tenderize the meat.
- Pat Dry: Before seasoning, always pat your chicken breasts thoroughly dry with paper towels. A dry surface allows for better browning and crispier skin (if applicable).
- Season Generously: Don't be shy with seasoning! A good rub of salt, black pepper, garlic powder, onion powder, and your favorite herbs (like thyme, rosemary, or oregano) will create a delicious crust and enhance flavor.
- Preheat Your Oven: Always ensure your oven is fully preheated to the target temperature before placing the chicken inside. This prevents uneven cooking and ensures the timings are accurate.
- Use a Baking Rack: If possible, bake your chicken breasts on a wire rack placed over a baking sheet. This allows for better airflow around the chicken, promoting more even cooking and preventing the bottom from getting soggy.
With these guidelines and tips, you're well on your way to mastering the art of oven-baked chicken breast. Say goodbye to dry, bland chicken and hello to consistently juicy, flavorful results every time. Enjoy the simplicity and deliciousness of perfectly cooked chicken, a versatile foundation for countless healthy and satisfying meals!
